Best Waterproof Flooring for Bathrooms (2026): What Actually Survives
Bathrooms are the hardest room in a house on flooring. Constant humidity, splashes from sinks and showers, wet feet, dropped towels left to soak, occasional plumbing failures, and the cleaning chemicals you use to deal with all of it. Most flooring fails in bathrooms within 5 years. Some flooring is built for it.
This guide covers what "waterproof" actually means in a bathroom context, which LVP and LVT products from our catalog perform best, and the installation details that separate a bathroom floor that lasts 20+ years from one that fails at year 3. We sell every product covered here at FloorFreight as an authorized Shaw and COREtec dealer.
Waterproof in a Bathroom: What That Actually Means
If you read our waterproof flooring explainer, you already know: "waterproof" is one of the most overpromised terms in flooring. For most rooms in the house, the distinction between "100% waterproof" and "water-resistant" doesn't matter much. For bathrooms, it matters a lot.
A bathroom waterproof floor needs to handle four things:
1. Surface water and splashes. Daily showers, hand washing, toilet area mopping. Any LVP with a sealed wear layer handles this.
2. Humidity and steam. Hot showers create 90-100% humidity that lingers for hours. Floors that absorb moisture (laminate, engineered hardwood, some cheap vinyl) swell over time even without direct water contact.
3. Standing water from accidents. Toilet overflows, leaking sink supply lines, water heater failures, kids leaving a tub running. Truly waterproof floors survive these events. Water-resistant floors don't.
4. Long-term moisture migration to the subfloor. This is where most "waterproof" floors fall short. Plank seams allow water through to the subfloor over time. Even with a waterproof core, the subfloor below can rot if water gets through the seams repeatedly.
The right bathroom floor handles all four. LVP with SPC core construction, sealed perimeter, and proper installation handles all four reliably. Cheap vinyl with WPC core handles the first three but is more vulnerable to long-term seam-level moisture.
SPC vs WPC for Bathrooms
For other rooms, WPC (Wood-Plastic Composite) and SPC (Stone-Plastic Composite) cores are roughly equivalent — pick by feel preference. For bathrooms, the math changes.
SPC core wins in bathrooms for four reasons:
Truly waterproof core. SPC's stone-based composition will never swell, warp, or degrade from water exposure — even over decades. WPC's foamed core can theoretically absorb trace moisture over time, especially if seams are compromised. For bathrooms specifically, SPC is the safer call.
Dimensional stability through humidity swings. Bathrooms cycle from cold/dry overnight to hot/humid during morning showers and back. SPC doesn't expand or contract significantly through these cycles. WPC handles humidity well too, but SPC handles it better.
Thinner profile fits under existing fixtures. SPC planks are typically 4-6mm thick. WPC is 6-10mm thick. The thinner SPC profile fits more easily under toilet flanges, door jambs, and vanity bases — important when retrofitting a bathroom without replacing fixtures.
Better dent resistance. Heavy vanities, toilets, claw-foot tubs — bathroom fixtures concentrate weight on small footprints. SPC's rigid stone-based core resists indentation better than WPC's softer foam core.
The trade-off is comfort. WPC feels warmer and softer underfoot. SPC feels harder and slightly colder. For bedrooms and living rooms, this difference matters. For bathrooms — where you're usually barefoot for a few minutes at a time — the durability difference outweighs the comfort difference.
In our catalog, most products labeled "Pro" (Shaw and COREtec) use SPC cores. Most products labeled "Originals" or "Resilient" use WPC cores. Use this as a rough sorting filter when shopping bathroom flooring.
Wear Layer for Bathrooms: 12 Mil Minimum, 20 Mil Preferred
For bathroom installations, your wear layer needs are higher than other rooms because of the cleaning chemicals and constant moisture interaction.
Minimum: 12 mil. Acceptable for guest bathrooms and powder rooms with light use.
Preferred: 20 mil. Right for primary bathrooms, family bathrooms, kid bathrooms — any space that sees daily showers and routine cleaning.
Overkill but justified: 30 mil. Commercial-grade. Worth it if you're flooring a multi-bathroom home with one product, or if you specifically want a forever-floor bathroom installation.
We covered the full wear layer breakdown in our LVP wear layer explainer. For bathrooms specifically, don't go below 12 mil — the cleaning chemicals and constant moisture exposure will wear through thinner wear layers fast.
Slip Resistance: What Matters and What Doesn't
Wet bathroom floors are a real safety risk, especially for kids and elderly residents. Most modern LVP comes with textured surfaces and slip-resistant wear layers, but textures vary.
What helps with slip resistance:
- Textured or embossed surface — most LVP has at least mild texturing; the deeper the texture, the better the wet traction. Look for "Embossed in Register" (EIR) products — the texture aligns precisely with the printed grain pattern, providing both visuals and slip resistance.
- Matte or low-gloss finish — glossy LVP is more slippery when wet. All quality bathroom LVP should be matte or low-sheen.
- Tile-format LVP with grout lines — the grout-line gaps in tile-format LVT products break up the slip surface, improving traction. Worth considering for primary bathrooms.
What doesn't matter much:
- Specific COF (coefficient of friction) ratings — most LVP products in this category don't publish COF ratings. The general principle (texture + matte = traction) is what matters in practice.
- "Pet-friendly" or "kid-friendly" branding — these labels often imply slip resistance but aren't standardized claims. The textured surface and matte finish are what actually create traction.
For bathrooms with elderly residents or anyone with balance concerns, prioritize tile-format LVT with deep texture and matte finish. The smaller tile sizes and grout lines provide additional traction over wood-look plank LVP.
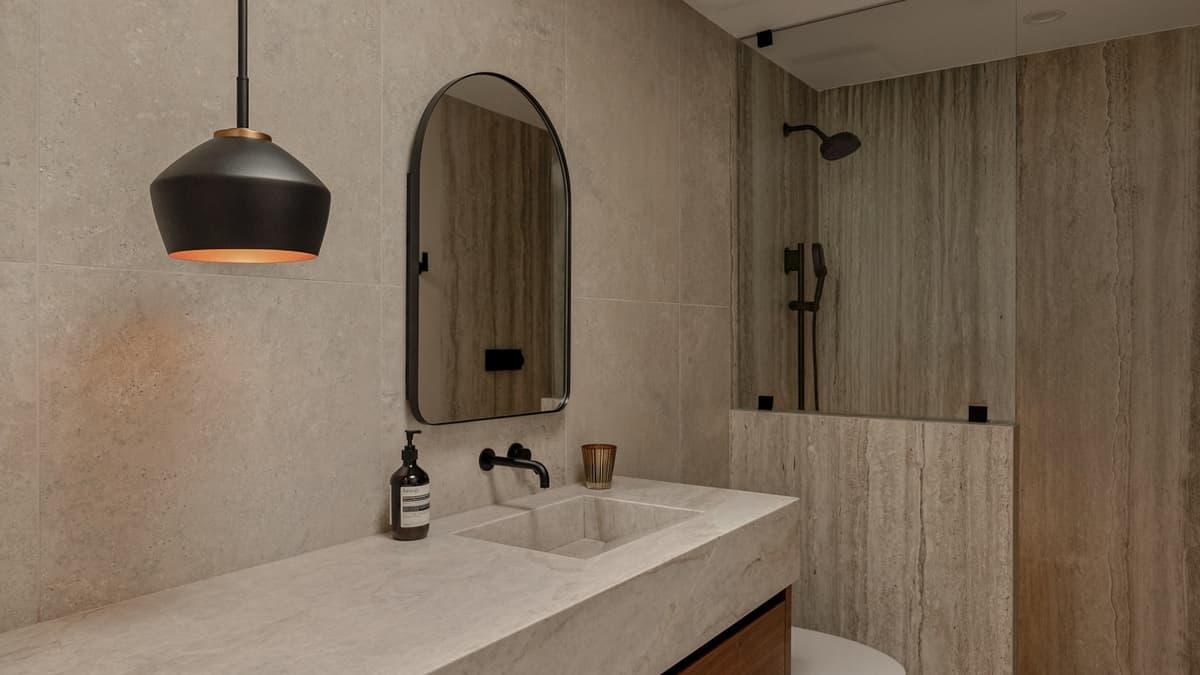
Tile-Format LVP for Bathrooms
Most LVP buyers think of plank products. For bathrooms, tile-format LVT (luxury vinyl tile) offers genuine advantages worth considering.
Why tile-format works better in bathrooms:
- Stone and marble visuals that look more "bathroom" than wood-look planks
- Smaller pieces mean more grout lines, better slip resistance
- Smaller pieces also fit better around toilet flanges and tight spaces
- Tile-format matches conventional bathroom aesthetics if you ever sell the home
In our catalog, the standout tile-format LVT products are:
COREtec CT Tile SPC 18 ($8.19/sq ft) — 18" × 36" large-format tiles with stone visuals. The largest tile format we stock. Reads as a real natural-stone slab. Five colors with names like Dolomi Limestone, Eterna Marble, Raw Terra Cotta.
COREtec CT Plus Tile ($7.59/sq ft) — 12" × 24" tiles, 8mm thick. Nine colors. The most popular bathroom format size — proportions match standard ceramic bathroom tile.
COREtec CT PPlus E Tile ($5.99/sq ft) — 12" × 24" tiles, 5mm SPC core. Five colors. Lower-priced option without sacrificing performance.
Shaw Paragon Tile Plus ($6.29/sq ft) — 12" × 24" tiles, 20 mil wear layer, attached pad. Fourteen colors with names like Ash, Bianco, Bone. The Shaw equivalent to COREtec CT Plus Tile at similar pricing.
For most bathroom installations, CT Plus Tile or Paragon Tile Plus is the right starting point. Both deliver the bathroom-appropriate aesthetics without breaking the budget.
Plank LVP for Bathrooms
If you want wood-look LVP in your bathroom (popular for primary bathrooms, often paired with floating vanities and contemporary fixtures), here's what to choose:
Top picks for bathroom plank LVP:
COREtec Pro Classics VV017 ($4.09/sq ft) — 7" × 48" planks, SPC core, 20 mil wear layer, attached cork. The best bathroom value in our catalog: SPC's bathroom-appropriate durability + 20 mil wear layer + COREtec's pet damage warranty + sub-$5/sq ft pricing. If you're flooring multiple rooms including a bathroom, Pro Classics is the right "whole-house" pick.
COREtec Pro Plus Enhanced HD 9" VV488 ($5.39/sq ft) — 9" × 72" planks, SPC core, 20 mil wear layer. Same construction profile as Pro Classics, wider planks for a more contemporary look.
Shaw Infinite SPC ($3.89/sq ft) — 7" × 48" planks, SPC core, 20 mil wear layer, EVA pad, 13 colors. Best Shaw bathroom value. Genuinely competitive with COREtec at the same spec at lower price — color count is the differentiator (Shaw has 13 Infinite SPC colors).
For premium bathroom installations:
Shaw Titan HD Plus Platinum ($6.79/sq ft) — 30 mil wear layer, 9" × 72" planks, SPC, attached IXPE. Commercial-grade bathroom durability at upper-mid pricing. The 30 mil wear layer survives aggressive cleaning regimens that would wear through 20 mil over time.
COREtec Originals Premium 3/4" CR500 ($10.69/sq ft) — 8.74" × 72" planks, 19mm thick. Forever-bathroom floor at premium pricing. Read the SPC bathroom advice carefully though — Originals products use WPC, not SPC. For a bathroom specifically, the Pro tier products above are usually the smarter pick despite the lower price.
Installation Details That Make or Break a Bathroom Floor
The waterproof construction is only half the equation. Installation matters more in bathrooms than any other room. Get these details right:
Subfloor preparation matters most.
Any LVP, even SPC-core LVP, fails if the subfloor moves. Bathrooms typically have subfloors that deal with more moisture over time than other rooms. Before installing LVP:
- Test concrete subfloors for moisture content (under 75% relative humidity per ASTM F2170)
- Confirm wood subfloors are stable, level, and dry (under 12% moisture content)
- Install a moisture barrier over concrete subfloors below grade
- Allow new construction subfloors to fully cure before installation
Around the toilet:
The toilet flange is the most vulnerable point in a bathroom LVP installation. Two right ways to handle it:
- Pull the toilet, install the floor, reset the toilet on top of the new floor. Adds work but creates the strongest seal. The floor goes under the toilet base, meaning no water can creep around the toilet's perimeter.
- Install the floor up to the toilet, with a tight cut around the flange. Saves work but requires precise cutting and proper sealing. The flange height must be maintained — sometimes requires shimming the toilet to seat correctly.
The wrong way: cutting around the existing toilet without lifting it. Leaves gaps where water inevitably penetrates.
Silicone the perimeter.
After installation, apply a continuous bead of 100% silicone caulk where the floor meets:
- The tub or shower base
- The base of the toilet (if you installed up to the flange)
- The base of the vanity
- The base of any plumbing fixtures (towel rod walls, etc.)
This is the single most important detail for long-term moisture protection. Silicone is flexible enough to handle the slight movement of LVP through humidity cycles and creates a real moisture barrier at the most vulnerable transitions.
Expansion gaps.
LVP expands and contracts slightly with humidity. In bathrooms with significant humidity swings, this expansion is more pronounced. Leave proper expansion gaps (typically 1/4") at every wall, covered by baseboard or quarter-round trim. Skipping this gap is a common failure mode that causes buckling within 12 months.
Acclimation — much simpler than hardwood for SPC.
SPC-core LVP doesn't require the moisture-based acclimation hardwood needs. Most manufacturers do recommend letting planks reach room temperature (65–85°F) for 24–48 hours before installation — cold planks can expand slightly once the room warms. For bathrooms, this is straightforward: leave the boxes flat in the room the day before you install. Always verify with your specific product's installation guide.
For our complete LVP installation walkthrough, see our LVP flooring installation guide.
What to Avoid in Bathrooms
A few categories we steer customers away from for bathroom floors:
Engineered hardwood, even "waterproof" engineered hardwood. No engineered hardwood handles bathroom humidity reliably long-term. The marketing of "waterproof hardwood" is misleading — they handle splashes, not the conditions of an actual bathroom. Real hardwood in bathrooms is asking for problems.
Standard laminate. Laminate is not waterproof, full stop. Even "water-resistant" laminate fails in bathrooms within 5-10 years. Don't put any laminate in a bathroom.
6 mil wear layer LVP. As noted, 12 mil minimum for bathrooms. Six mil products are designed for low-traffic residential spaces, not the cleaning-chemical-and-moisture environment of a bathroom.
Glossy or high-shine finishes. Slippery when wet. Matte or low-sheen only.
Wood-look LVP in bathrooms where stone-look would fit better. This is preference, not safety. But many primary bathrooms read better with stone or tile-format LVT than with wood-look plank.
WPC core LVP in primary bathrooms with active shower use. WPC handles bathrooms; SPC handles bathrooms better. For bathrooms specifically, pay the small upgrade premium to get SPC.
Cost Analysis
For a typical 8' × 10' bathroom (80 sq ft):
Budget option: Shaw Infinite SPC at $3.89/sq ft = $311 material. Add $200-400 installation labor for total of $511-711.
Mid-tier: COREtec Pro Plus Enhanced HD 9" VV488 at $5.39/sq ft = $431 material. Total with installation $631-831.
Premium: Shaw Titan HD Plus Platinum at $6.79/sq ft = $543 material. Total with installation $743-943.
Forever-floor: COREtec Originals Premium 3/4" CR500 at $10.69/sq ft = $855 material. Total with installation $1,055-1,255.
For comparison, ceramic tile bathroom installations typically run $1,200-2,500 for the same 80 sq ft (material + thinset + grout + installation). LVP delivers comparable performance at a fraction of the price.
For full bathroom remodel projects (where you're also replacing the vanity, toilet, and shower fixtures), the floor cost difference is a small percentage of total project cost. Don't underspend on flooring to save $200 in a $15,000 bathroom remodel.
Final Word
The bathroom flooring decision has gotten simpler in the last 10 years. LVP with SPC core has matured to the point where it delivers real bathroom-appropriate performance — true water-resistance, slip-friendly surfaces, dimensional stability through humidity cycles — at a fraction of tile's cost.
For most bathroom installations, the right path is:
- Wood-look plank: COREtec Pro Classics VV017 ($4.09/sq ft) or Shaw Infinite SPC ($3.89/sq ft) — both SPC, both 20 mil
- Stone or tile-look: COREtec CT Plus Tile ($7.59/sq ft) or Shaw Paragon Tile Plus ($6.29/sq ft) — for bathrooms that want the traditional tile aesthetic
- Premium forever-floor: Shaw Titan HD Plus Platinum ($6.79/sq ft) — 30 mil wear layer for commercial-grade durability
Match SPC + 20 mil minimum to your bathroom, install with proper subfloor prep and silicone caulk perimeter, and you'll have a 20+ year bathroom floor. For broader LVP shopping context, see our Shaw LVP buyer's guide and COREtec LVP buyer's guide.
Order a $5 sample before you commit. Bathroom floors read very differently in your home's natural light and against your specific vanity, toilet, and fixture colors than they do on a screen.
Related Posts
Keep Reading

COREtec vs Shaw LVP: Which Should You Buy? (2026)
10 min read
Best LVP for Pets (2026): What Actually Holds Up to Claws, Accidents, and Active Households
9 min read

COREtec LVP Buyer's Guide: Originals vs Pro vs Premium (2026)
10 min read
LVP vs Engineered Hardwood: Which Should You Actually Buy? (2026 Decision Guide)
9 min read
Shop the floors in this guide